
Custom Artists Studio Work Table
Sturdy, cheap and easy… UPDATED
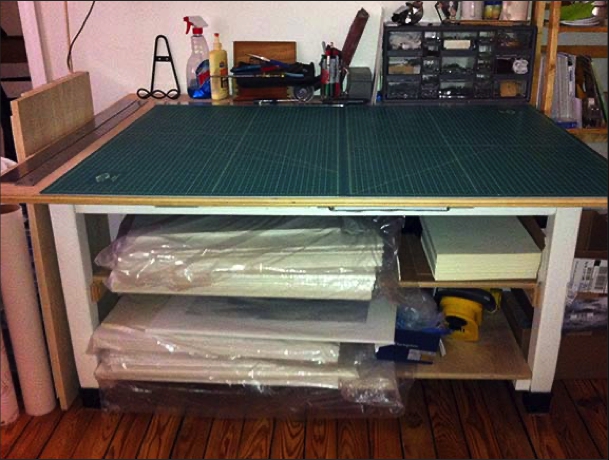
Many artists have a need for a large, strong studio surface for cutting mats, framing, dealing with glass, etc. Suitable tables can be quite expensive (almost laughably so). This is a very easy, very inexpensive solution to the problem. I’ll describe the one I made for myself.
A little paint underneath (the table bottom was in bad shape and needed a lot of bubble gum removed), a cleanly waxed top, and I had myself a great, practical studio work table. Covering most of the top is two 24x36 inch self-healing cutting surfaces (available at Amazon). As you can see from the picture, this thing is large enough on top, stores enough underneath and gets heavy use. All for very little money and just a couple hours of work. The key is the sheet of hardwood plywood, check it out.
Surface…
Easy. Just get yourself down to Home Depot or some similar station and pick out a 4x8 ft. slab of hardwood plywood. I based my needs on rigging a table that will hold, and allow cutting, of a 32x40 sheet of rag – with all my tools, etc. lined up along the wall. That meant I had to allow for the 36” depth of my cutting surface and a few inches for my “stuff.” They will cut your wood down to size right there at the store – I had my top cut to 44x54 (wide enough to cover the table bottom and give me some side room). Voila – instant table top. Some light sanding along the edges, and all you have to do is paste-wax the surface. A number of years later, when we moved, I did apply another layer of wax.
Table
Literally almost anything. We had an old school lab table floating around. The unbelievably heavy top was held on by screws from underneath. I removed the top (tossed it) and simply screwed my new top onto the base from under – pretty much centering it. Alternative bases can easily be used – and one can always just leave the top on, and center the new expanded top over it. One could even use two smaller, matching tables.
Shelves…
When I bought the top, there was enough left over from the 4x8 foot slab of hardwood plywood to have a shelf cut for mounting underneath (I added a second shelf when we moved). All I needed was a couple of screwed-on supports cut from scraps from the same sheet of plywood. If where you get the large pieces cut they don’t want to do this, just take the scraps to someone with a saw (like me) and ask them to do it. Too easy and quick to turn anyone down.
UPGRADING MY STUDIO WORK TABLE…
I didn't believe that I could improve on this idea, but I have just updated the table with three-inch table risers (I was going to make them but it turned out that they are just too inexpensive to pass up). Work tables are expensive, so a number of people have been inspired by my posting and made their own.
The original table – the notes on that above – is thirty inches tall. That's going to usually be the result when making your own this way – most old table bases you will find are about 30 inches tall. I used an old school lab table with the top removed. 30 inches is OK unless you find yourself spending extended periods of time bending over it.
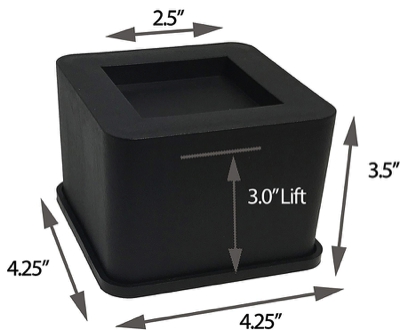
I researched on line and found that top of the line work tables are adjustable up to 38 inches tall, with 33 to 35 being a standard for slightly cheaper (still far too expensive) models. The three inch gain from these leg boosters – taking me to 33 inches – eliminates back strain while working (a six foot guy might need more than three inches). These, with rubber floor protection, are the iPrimio Bed and Furniture Square Risers.